Thursday, 11 December 2014
Week 7 - Perspective and lighting study on a tank
This week we had to design a simple tank with the main focus on learning how to make designs with a two point perspective and then shading and shadowing them accurately.
I started with the mood board as usual. I was looking particularly at the overall basic shapes and angles of the tanks rather than the interesting details.
With a good idea about tank shapes I went about creating a shape which I could easily shadow in the end. As I had not done much perspective before and practically no shadowing using official techniques I decided early on two rules for myself. The first was to keep it really simple so I could learn effectively how to shadow. The second was to stay away from rounded surfaces for now. I put these in place so I could complete this task effectively and maybe for once in a reasonable amount of time.
I started with a couple of ideas on vanishing points and general bounding boxes. This one below was the one I went with in the end to put my initial designs into.
I dropped the opacity of the lines and drew out some basic tanks with not much detail to them. I included a lot of diagonal lines in the designs and found it difficult at times to get the opposing symmetrical line correct.
For the designs I liked the bottom two and the middle one. I ruled out the middle one as most of the sides are right angles to one another and wouldn't make the shading that interesting. I went with the bottom right design in the end as it had a good level of detail and also many angled surfaces.
So I took that layer than then drew final perspective lines for all the angles so afterwards I could draw the final one out accurately.
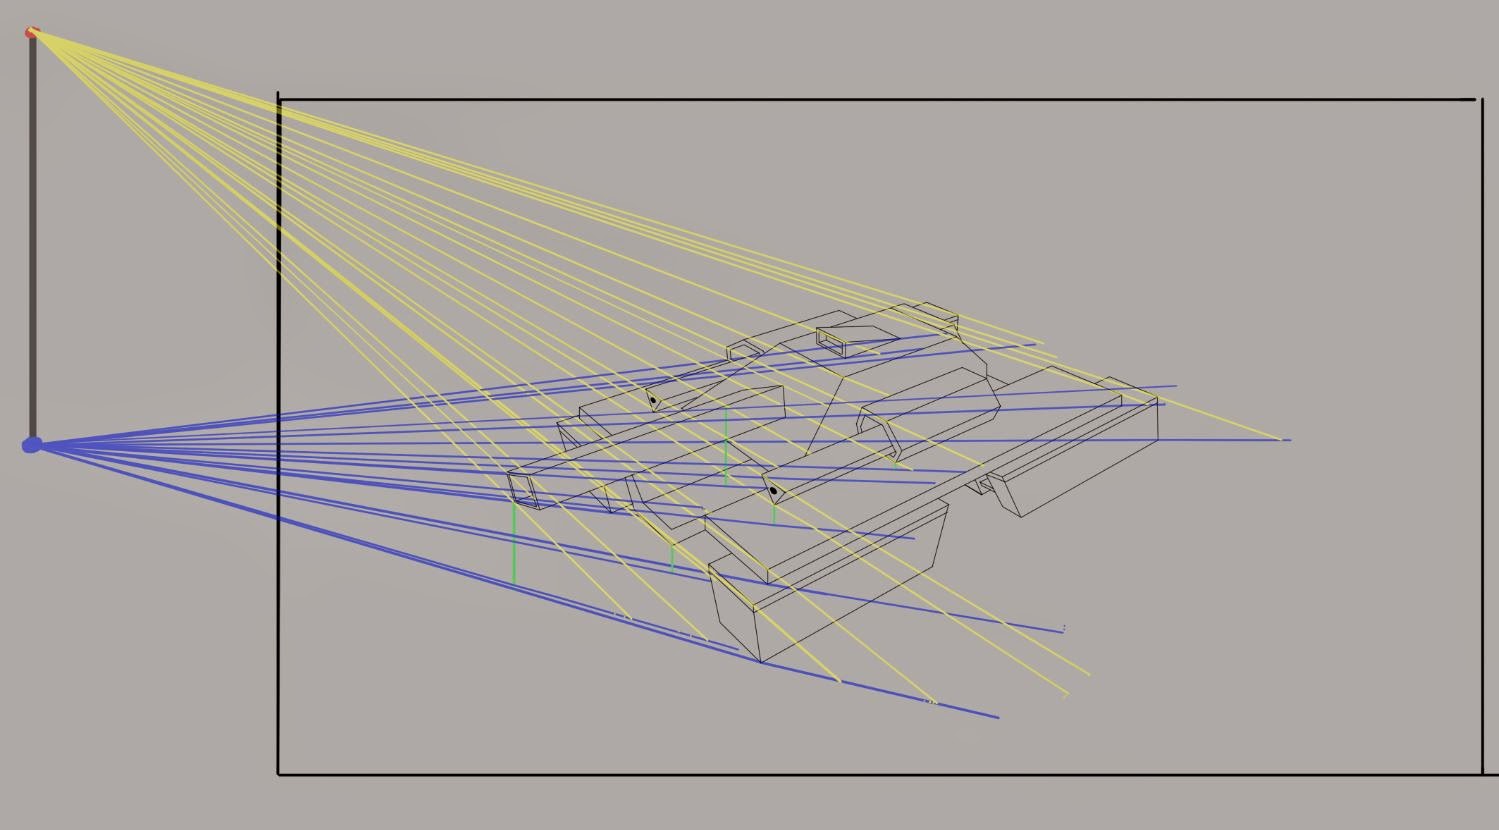
I drew out the final design and then added a light source and then tried to calculate the angles and size of where the shadows would be. I found surfaces which were off the 'ground' difficult to calculate where the shadow might fall. I ended up adding the green lines to show the distance from where the ground was below the point. I then drew the blue shadow line from the base of that green line to get the shadow area. I don't know if this is the proper way to do it but it seems to have worked out alright.
With my shadows all marked out I then went about deciding on what values each of the surfaces would be. I decided my light areas would be 20 and the ground would be 40. This gave me all the values I needed for the right angled and shadowed areas. For the diagonal areas I took a rough estimate of the angle then picked a value which would be equal to that angle. This is my finished piece underneath.
I learned that for a more complicated design this would be very time consuming indeed and I have a renewed respect for those who complete excellent concepts of machines. I also learned that I need a lot of practice doing this to do it effectively and more realistically.
Subscribe to:
Post Comments (Atom)


No comments:
Post a Comment
Note: only a member of this blog may post a comment.